UPTOTE on Etsy

Thursday, March 10, 2011

It's coming......

some of our first finds, the house, the swing and the table hidden by the tree, all put out for junk!
In the town I live in twice a year they let you put out your junk.  I think it is called bulk pick up.....It is a day that my family looks forward to every year.  We spend hours in the car, trolling for junk!  We love it, finding a treasure, maybe having to work on it a little, but it is the heart of Upcycling, I love to recycle.  Never throw away, always reuse.  In honor of spring and the upcoming Bulk pickup day.  I give you a few of my past finds!


before and after of an ottoman, free..And I had gotten the fabric for free too.

Item free, results priceless.......


Last October we found this cabinet, perfect condition, just needed some cleaning!


A desk for Liam to do his homework at, all I had to do was scrub it with comet!


This is my daughter's desk and it was off the street too.


We use this dresser to keep the toy clutter down, I still need to get knobs for it, but otherwise it is in great shape!         


Sorry for the sideways picture, this dresser was in sad shape when I picked it up, a few coats of paint and it is a great, gloves and hats dresser.  Yes, hide the clutter!


I think this chair is one of my favorite finds, it was put out on the street with the ugliest cushion covers I had ever scene.  I went out and for about $50.00 in fabric, recovered the existing foam cushions and have a treasure I will keep for a lifetime!


OK, the doll was purchased, and the chair slip covered.  But the chair was free, and in a pair.  I love them, they swivel and are very comfortable!


What are you going to find this year.  recycling can be fun and beautiful, as well as help lessen the load on the landfills, experiment, have fun and most of all enjoy giving items a second home and a new life.

You know what, I forgot the most important lesson of all, teaching your children to give items a new life!  Show them that we are not a throw away world, that what we do matters, give things away don't throw away.  Live a full and upcycled life,


   Caroline


Saturday, February 26, 2011

New products

This week I am designing a hedgehog crayon tote, but I need to work fast, I am leaving for a wedding on Wednesday!

Sunday, February 20, 2011

curtains for my daughter


This is the start/ middle of my 6 year old daughters room makeover.  She is moving from baby tings to pre-teen.  I don't want to have to change this room again for at least 5 years, so this is what I am working on.

Her old curtains were just roman blinds, in off white.  Her new curtains are a blue paisley with white trim down each side.  I have not hemmed them yet, since I want to trim the bottom in white and she wants them left as is.


We are also trying to decide, what length to hem them, since her windows are all a different distance from the floor.


I was looking in my computer files for old pictures of her room, all I could find was some pictures of when we viewed the house.  So this is the before pictures.

And now the after

Happy stitching!


Wednesday, February 16, 2011

new clear 3 d bag Tutorial

I am really not a big fan of plastic, I don't like to use it at all, so I purchased a recyclable plastic product for this project.  We are going on a trip soon and I need see through bags for the TSA!!!!!    The following is my first tutorial on how to make a 3d bag.  have fun, I will be making and posting a few (hopefully a few dozen) of these over the next few days!
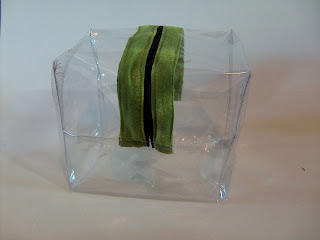
finished product!  4.5"*5"*6"

 First you need a strip of fabric or plastic for the body, I used a piece 11"*22"'

a 10" zipper ( or a zipper the width of your fabric)

The green banding is 4 pieces of 1/2"811" fabric.
and Matching thread!
Cut all your pieces
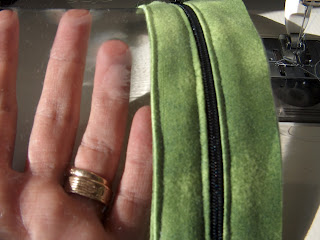
sandwich the zipper in between 2 layers of the banding fabric as shown.  with the zipper closed.
Stitch down one side


 flip the banding so the zipper is on the outside and wrong sides of the fabric are facing each other.

 stitch the other side of the zipper in the same fashion, turn so the zipper is showing.  At this point, I like to top stitch the zipper to the fabric, this helps to keep the fabric away from the zipper teeth.
Your project should look something like this.

Next take the main body fabric and place right wrong side of body to right side of band/zipper piece.
Stitch along the length, use the picture as a reference.
fold the seam allowance under.  turn the seam allowance for the top of the banding under and top stitch the edge.

when you have done both edges you should have a
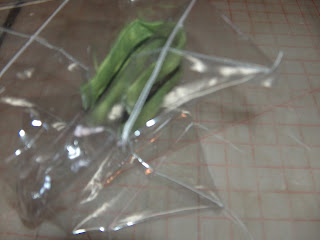
tube of fabric. that looks like the picture.
Trim the edges, and line up the zipper so it is in the middle of the tube as shown.

before we move on to more sewing, turn the project inside out, and open the zipper about half way.  By opening the zipper, you will be able to easily turn the box right side out when it is completed.

 Stitch down each side of the bag.
Now comes the 3d part........Ready for some sewing magic?
Fold the corners diagonally matching side seams to the top of the bag.

Measure in 2 1/2 " from the corner and mark a straight line to  stitch,  
On all four corners.......


cut off the excess of the corner.....


 turn right out and enjoy.


Monday, February 14, 2011

new doll tote

Ok, so this really isn't an uptote item but it is something I came up with , well kind of came up with.  I saw one for sale and created something just a little bit different!


A few sneak peaks of the new bag


Part of the lining of the main bag and one of the smaller bags, I am enjoying the design process and taking the time to photograph, it too.  By taking the time to photograph the process, I am documenting a part of my life that is very special to me.  I hope you enjoy your crafting too!