
I am really not a big fan of plastic, I don't like to use it at all, so I purchased a recyclable plastic product for this project. We are going on a trip soon and I need see through bags for the TSA!!!!! The following is my first tutorial on how to make a 3d bag. have fun, I will be making and posting a few (hopefully a few dozen) of these over the next few days!
 First you need a strip of fabric or plastic for the body, I used a piece 11"*22"'
a 10" zipper ( or a zipper the width of your fabric)
The green banding is 4 pieces of 1/2"811" fabric.
and Matching thread!
Cut all your pieces
 sandwich the zipper in between 2 layers of the banding fabric as shown. with the zipper closed.
Stitch down one side

flip the banding so the zipper is on the outside and wrong sides of the fabric are facing each other.

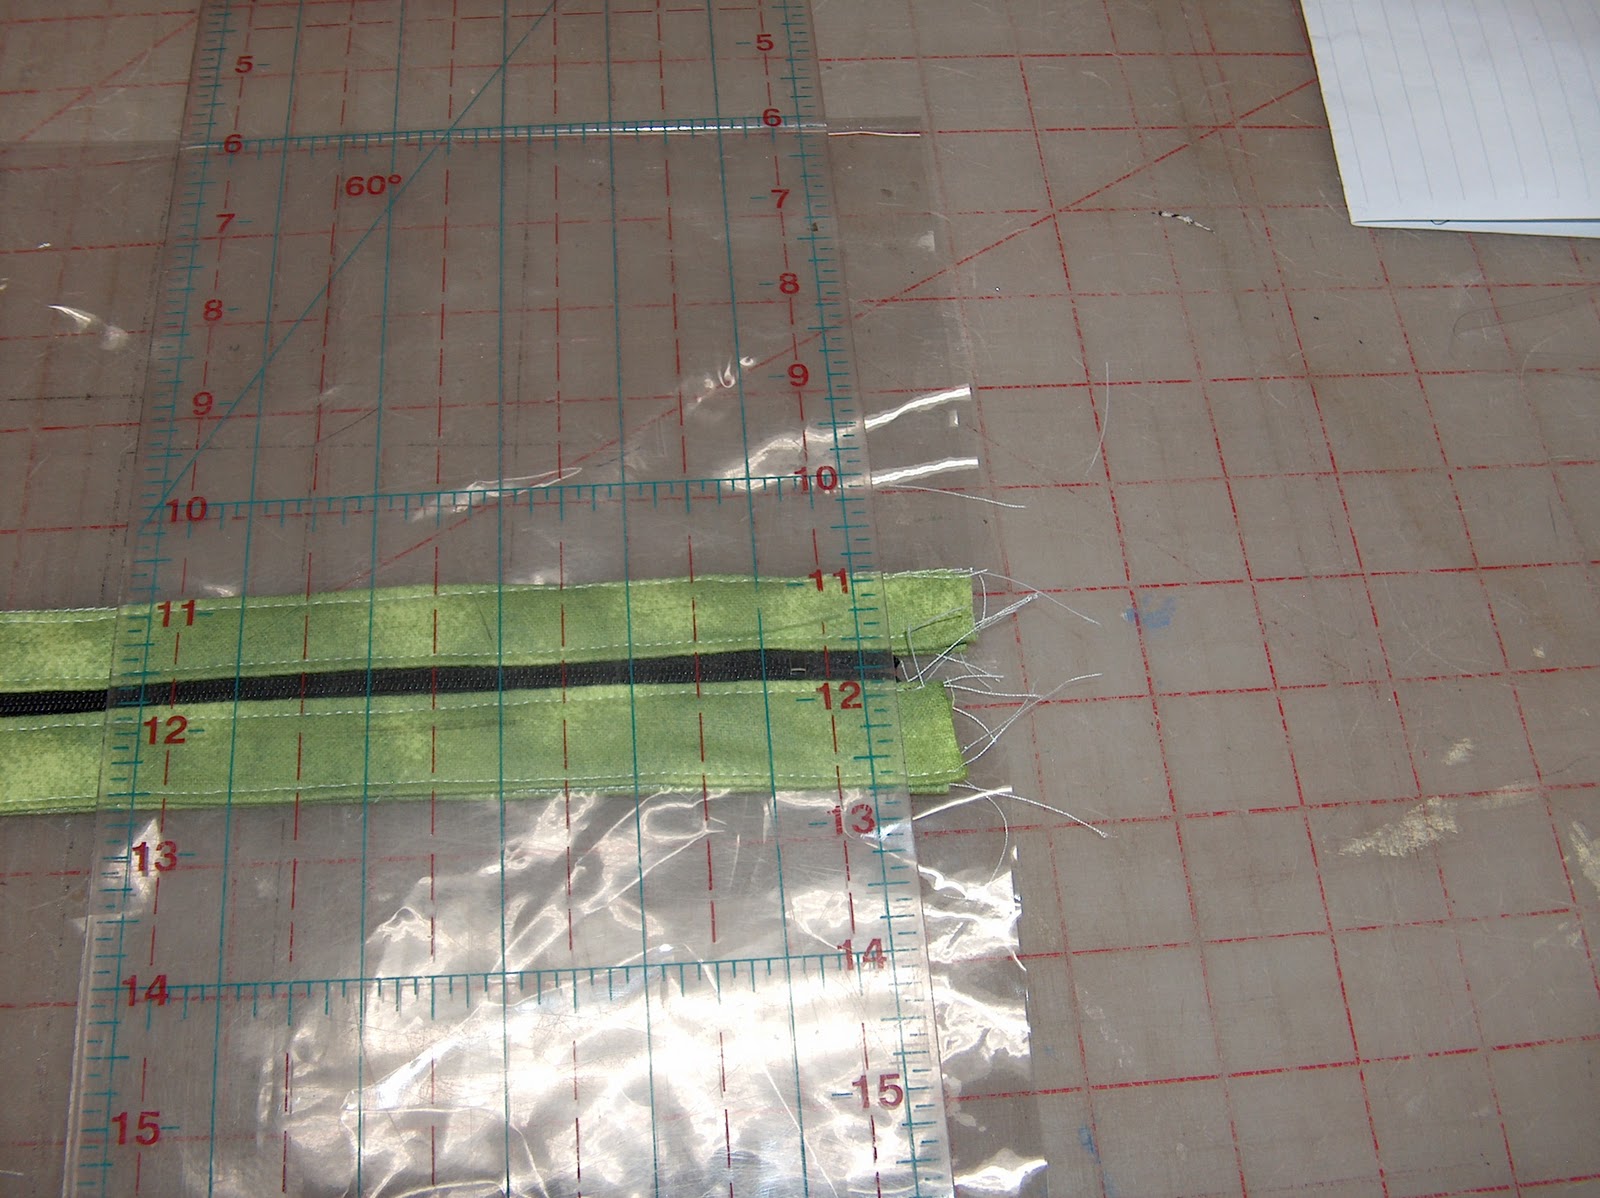
 stitch the other side of the zipper in the same fashion, turn so the zipper is showing. At this point, I like to top stitch the zipper to the fabric, this helps to keep the fabric away from the zipper teeth.
Your project should look something like this.
 Next take the main body fabric and place right wrong side of body to right side of band/zipper piece.
Stitch along the length, use the picture as a reference.
 fold the seam allowance under. turn the seam allowance for the top of the banding under and top stitch the edge.

when you have done both edges you should have a
tube of fabric. that looks like the picture.
Trim the edges, and line up the zipper so it is in the middle of the tube as shown.

 before we move on to more sewing, turn the project inside out, and open the zipper about half way. By opening the zipper, you will be able to easily turn the box right side out when it is completed.
 Stitch down each side of the bag.
 Now comes the 3d part........Ready for some sewing magic?
Fold the corners diagonally matching side seams to the top of the bag.

 Measure in 2 1/2 " from the corner and mark a straight line to stitch,
On all four corners.......
 cut off the excess of the corner.....

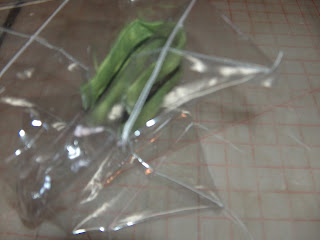
turn right out and enjoy.
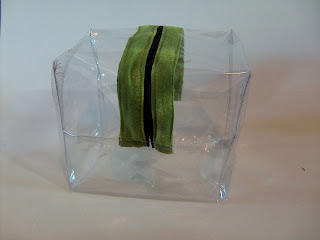
 | |
| finished product! 4.5"*5"*6" |

a 10" zipper ( or a zipper the width of your fabric)
The green banding is 4 pieces of 1/2"811" fabric.
and Matching thread!
Cut all your pieces
 sandwich the zipper in between 2 layers of the banding fabric as shown. with the zipper closed.
Stitch down one side

flip the banding so the zipper is on the outside and wrong sides of the fabric are facing each other.


Your project should look something like this.
 Next take the main body fabric and place right wrong side of body to right side of band/zipper piece.
Stitch along the length, use the picture as a reference.


when you have done both edges you should have a
tube of fabric. that looks like the picture.
Trim the edges, and line up the zipper so it is in the middle of the tube as shown.


Fold the corners diagonally matching side seams to the top of the bag.


On all four corners.......


turn right out and enjoy.
No comments:
Post a Comment